Description
This post will give you a guide to the topics of connection between:
- WinCC Runtime Advanced and S7 controller via Industrial Ethernet (PROFINET)
SIMATIC HMI Panel and S7 controller via Industrial Ethernet (PROFINET)
Connection between WinCC Runtime Advanced and S7 controller
Requirements
- WinCC (TIA Portal) Advanced
- STEP 7 (TIA Portal) Basic/Professional (depending on the controller used)
- PC with PROFINET/Ethernet interface
- S7 controller with PROFINET/Ethernet interface
Instructions
- Create a new project in the TIA Portal.
- In the Project View you double-click "Add new device" and select the S7 controller. Click the "OK" button to add the controller.
Note
Depending on the selected CPU, the dialog "PLC Security settings" is automatically displayed. Parameterize the security settings according to the requirements of your plant. You may cancel the dialog and configure the settings in the CPU at later time via Properties > General > Protection & Security.
Through the Hardware Catalog you can add more components to the Device View (like power supply, IO modules).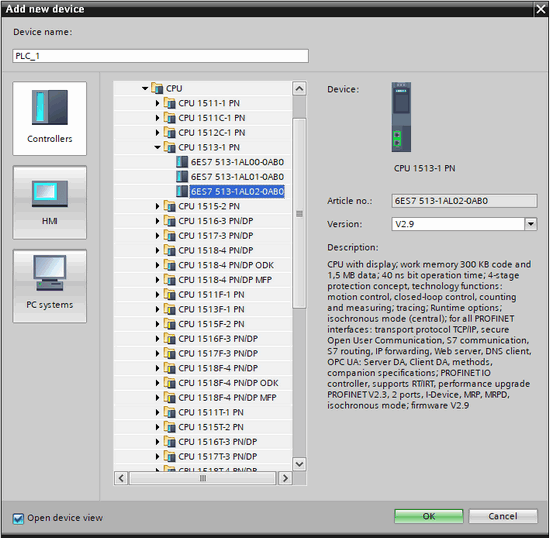
Fig. 01 - Click the PROFINET interface of the S7 controller and assign a unique IP address and the associated subnet mask under "Properties > General > Ethernet Addresses".
- Double-click "Add new device" and select WinCC Runtime Advanced.
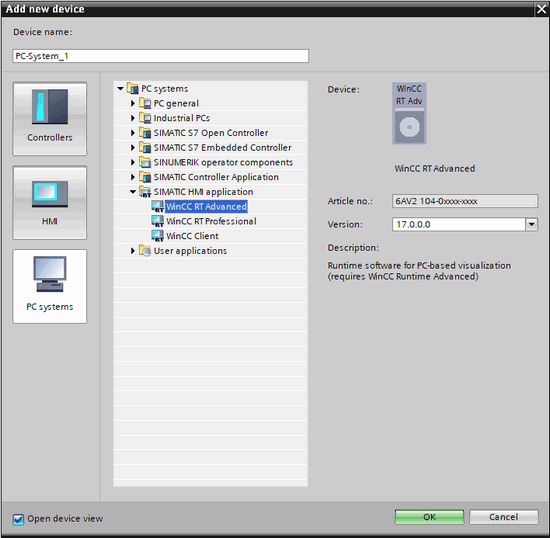
Fig. 03 - In
the Device View in the Hardware Catalog you select the "IE General"
communication module and double-click to add this to the PC station.
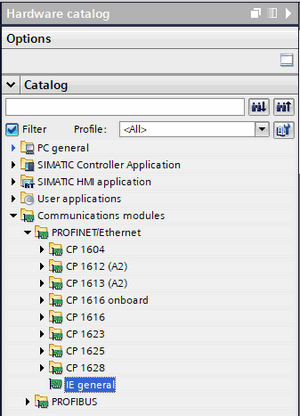
Fig. 04 - Click
the "IE General" interface just added. Under "Properties > General
> PROFINET interface [X1] > Ethernet Addresses" you enter the IP
address and subnet mask of the Runtime Station.

Fig. 05 - Switch to the Devices & Network view and enable "Connections" to create an HMI connection.
Connect the interfaces of the S7 controller and the Runtime station by drag-and-drop.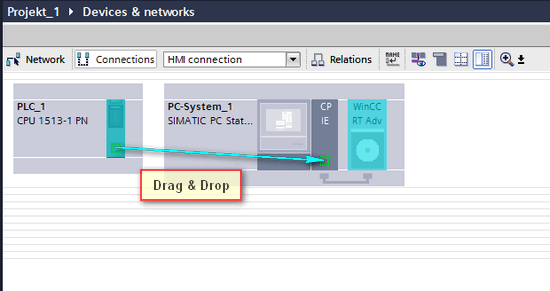
Fig. 06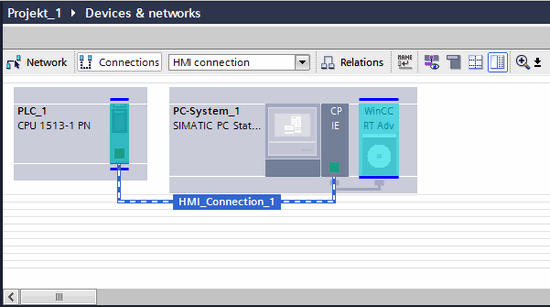
Fig. 07 -
Click the HMI connection. Under "Properties > General >" you
enter the name you are using in the PG/PC interface of the Runtime
station. In this example we use the preset name "S7ONLINE".

Fig. 08 - Open the PG/PC interface on the Runtime station via "Start > Control Panel > Set PG/PC interface.
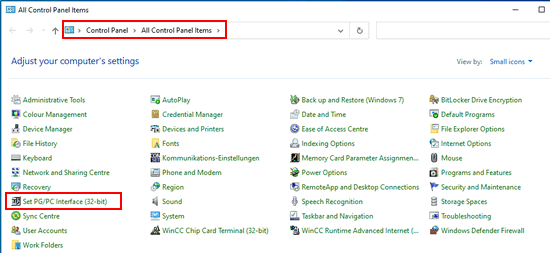
Fig. 09 - Under
Access Point of the Application, select the access point that was also
set under point 8. In this example we use the preset name "S7ONLINE".
Under "Interface Parameter Assignment Used:" you select the "TCP/IP Ethernet Adapter" you are using.Select the entry of your interface with the extension ".TCPIP.1". If set correctly, the entire entry in the example is "Intel(R) 82574L Gigabit Network Connection.TCPIP.1".
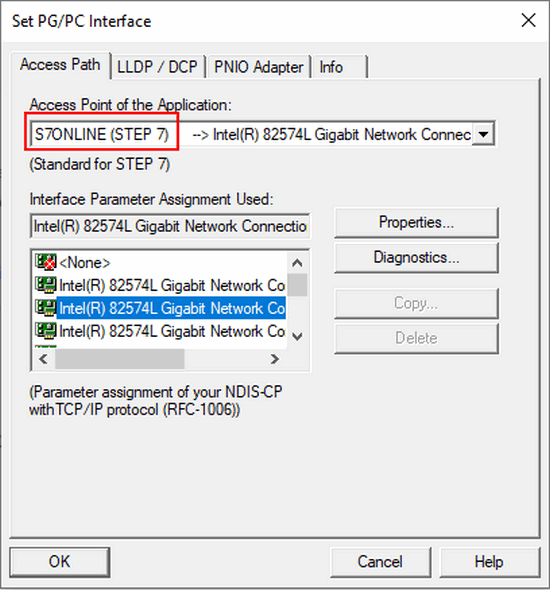
Fig. 10 - Complete the configuration and download the project to the S7 controller and the Runtime station.
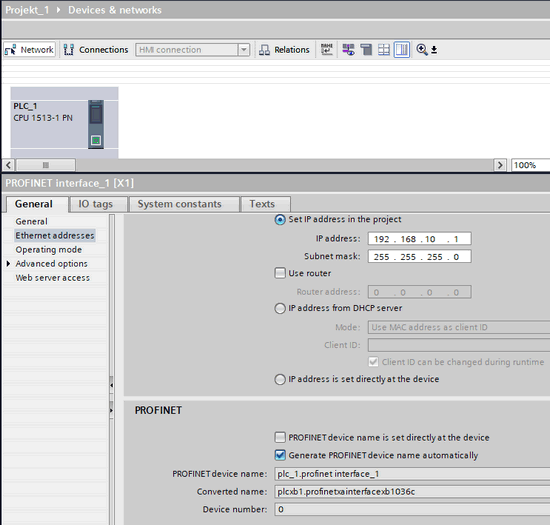
Fig. 02
Connection between SIMATIC HMI Panel and S7 controller
Requirements
- WinCC (TIA Portal) Basic/Comfort (depending on the panel used)
- STEP 7 (TIA Portal) Basic/Professional (depending on the controller used)
- SIMATIC HMI Panel with PROFINET/Ethernet interface
Make sure that the operator panel you select can communicate with the desired controller. This information is in the technical data of the device. - S7 controller with PROFINET/Ethernet interface
Instructions
- Create a new project in the TIA Portal.
- In the Project View you double-click "Add new device" and select the S7 controller. Click the "OK" button to add the controller.
Note
Depending on the selected CPU, the dialog "PLC Security settings" is automatically displayed. Parameterize the security settings according to the requirements of your plant. You may cancel the dialog and configure the settings in the CPU at later time via Properties > General > Protection & Security.
Through the Hardware Catalog you can add more components to the Device View (like power supply, IO modules).

Fig. 11 - Click
the PROFINET interface of the controller and assign a unique IP address
and the associated subnet mask under "Properties > General >
Ethernet Addresses".

Fig. 12 - Double-click "Add new device" and select the HMI panel. Place a check mark for "Start device wizard" and click the OK button.
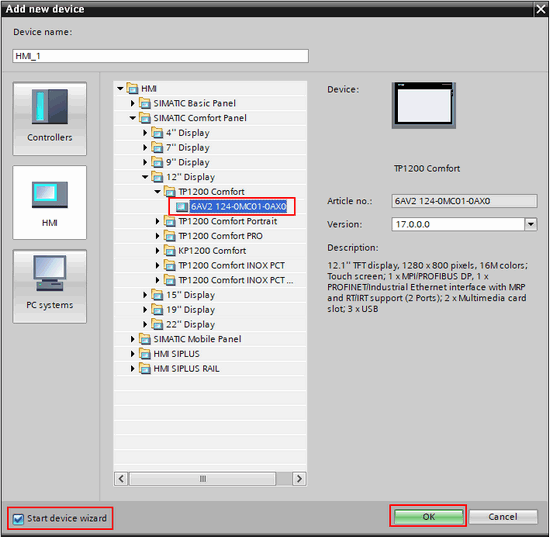
Fig. 13
- In
the "HMI Device Wizard" dialog that opens, click "Browse" and select
the CPU with which you want to establish a PLC connection.
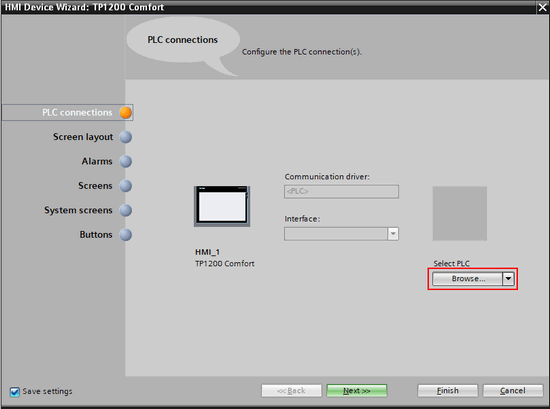
Fig. 14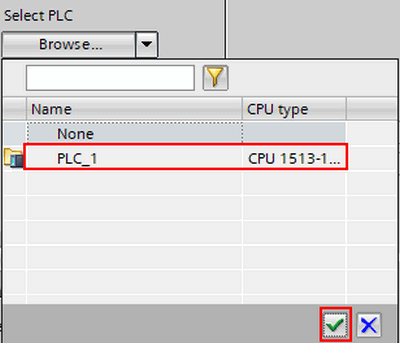
Fig. 15 - The connection parameters are entered and the next free IP address is automatically reserved for the HMI panel. Close the HMI wizard by clicking the "Finish" button.
- Complete the configuration and download the project to the S7 controller and the HMI panel.
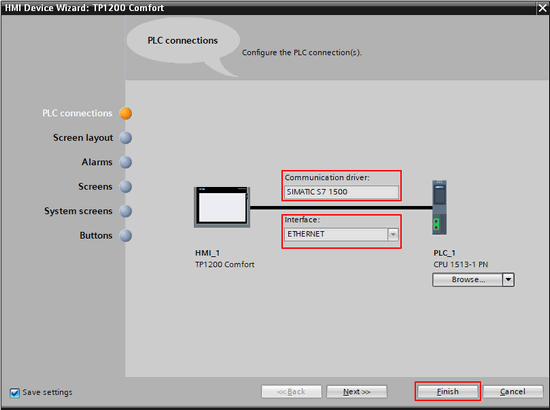
Fig. 16


0 Comments:
Post a Comment